


Downloads
Product Brochure | |
Specification | |
Technical Drawings | |
CAD | |
Installation |
Enquiries
For direct sales and partnership enquiries, please email
Frequently Asked Questions
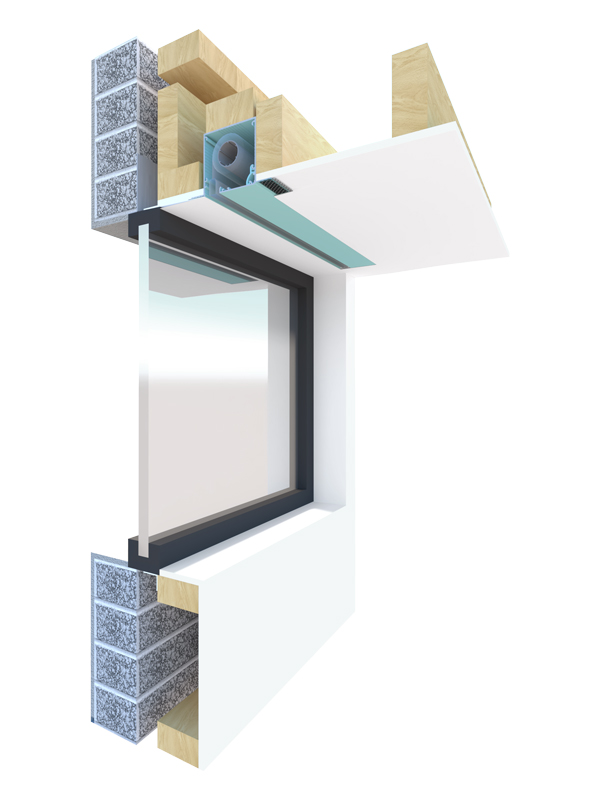
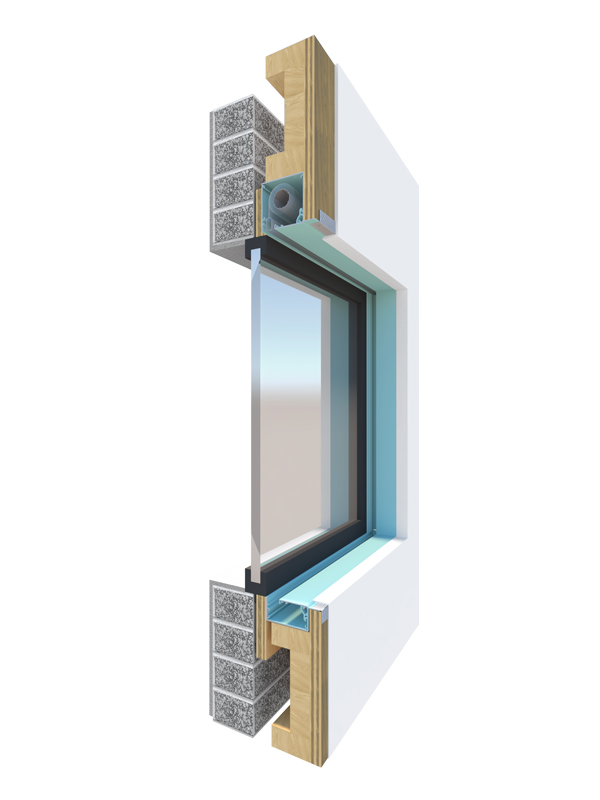
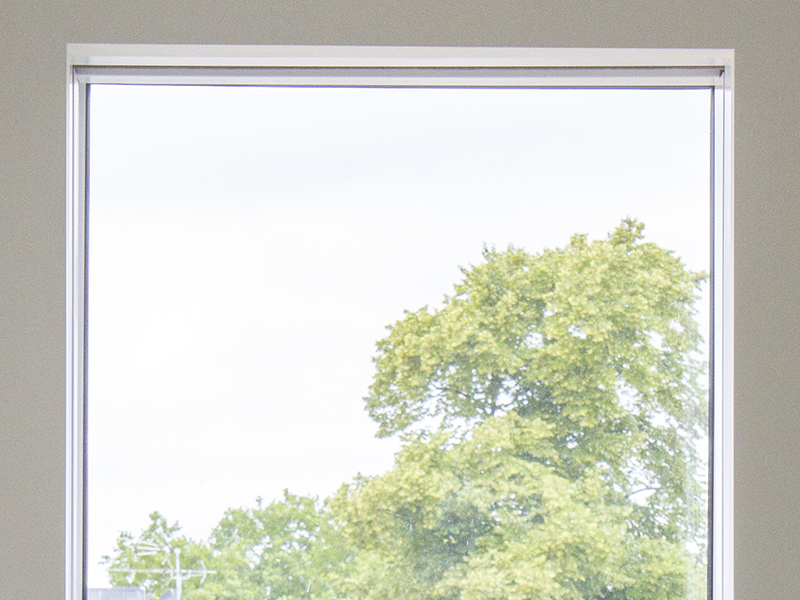
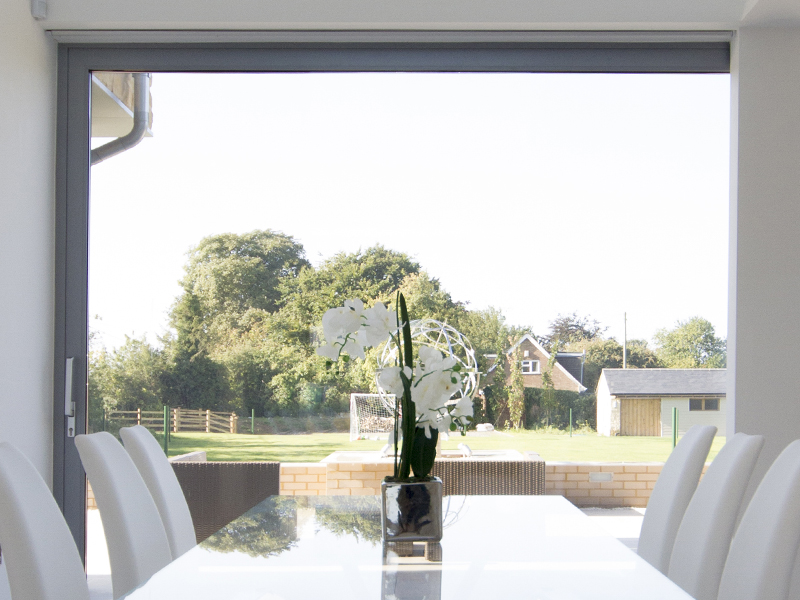
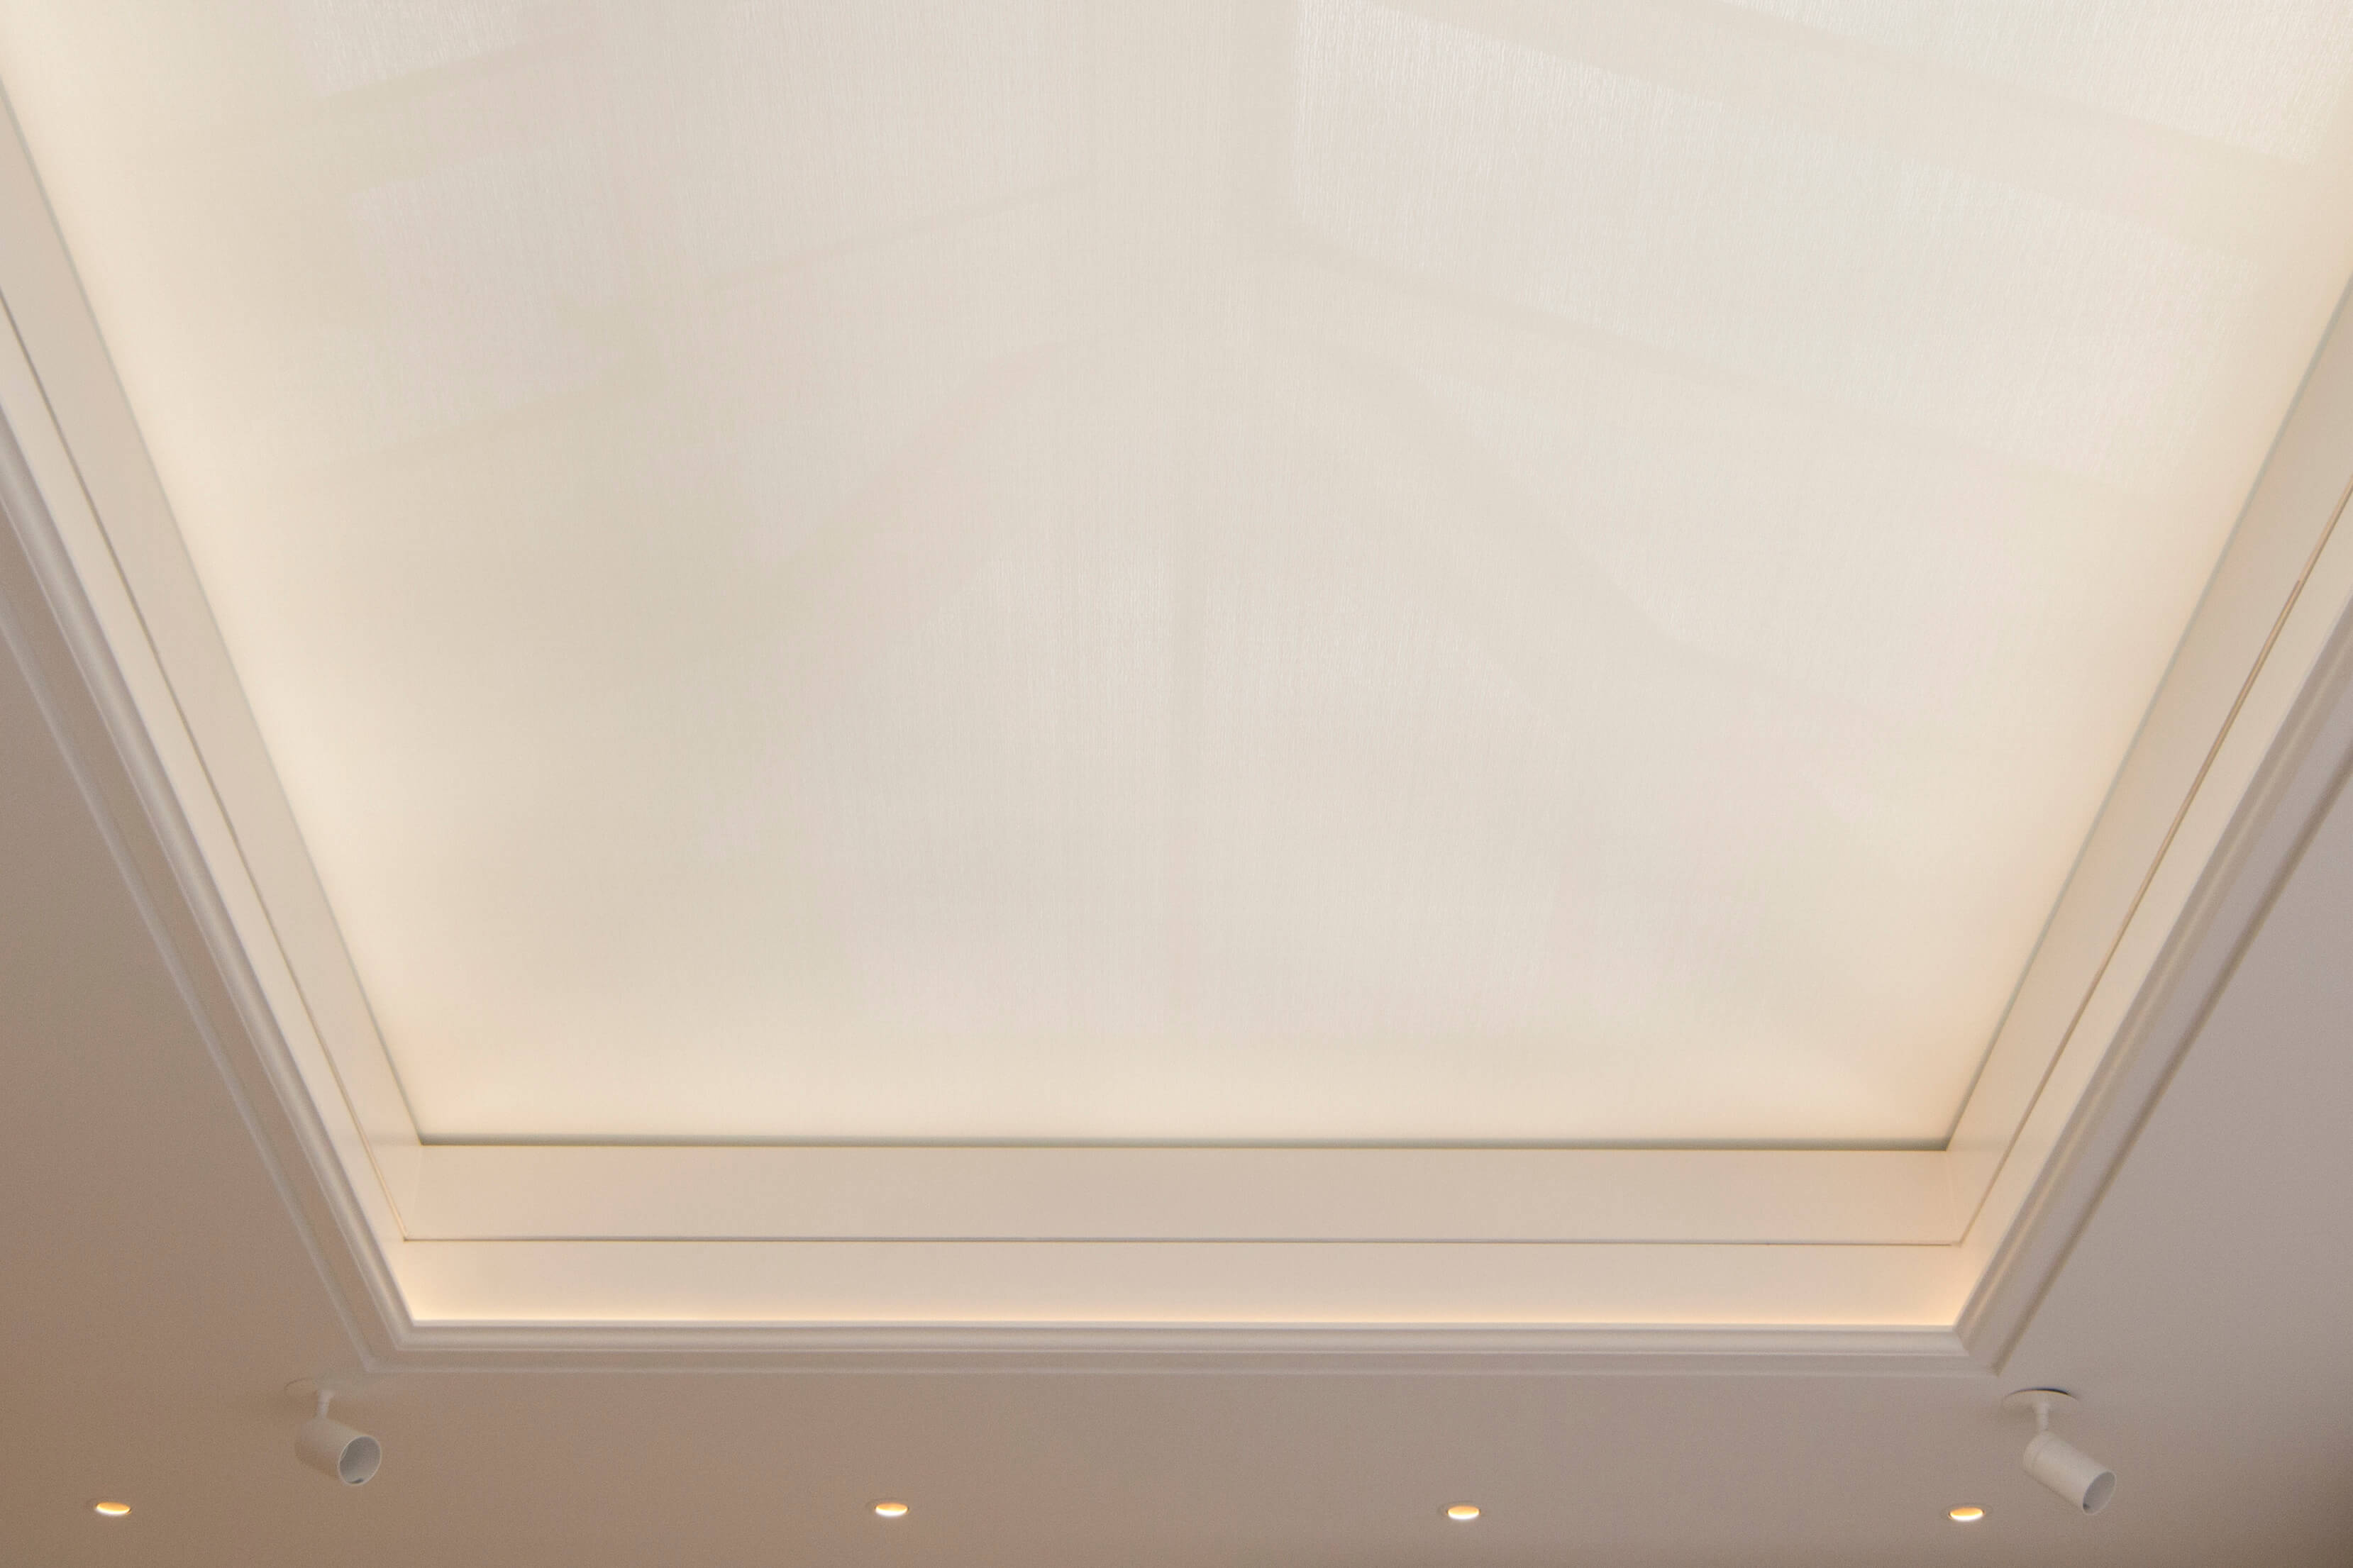
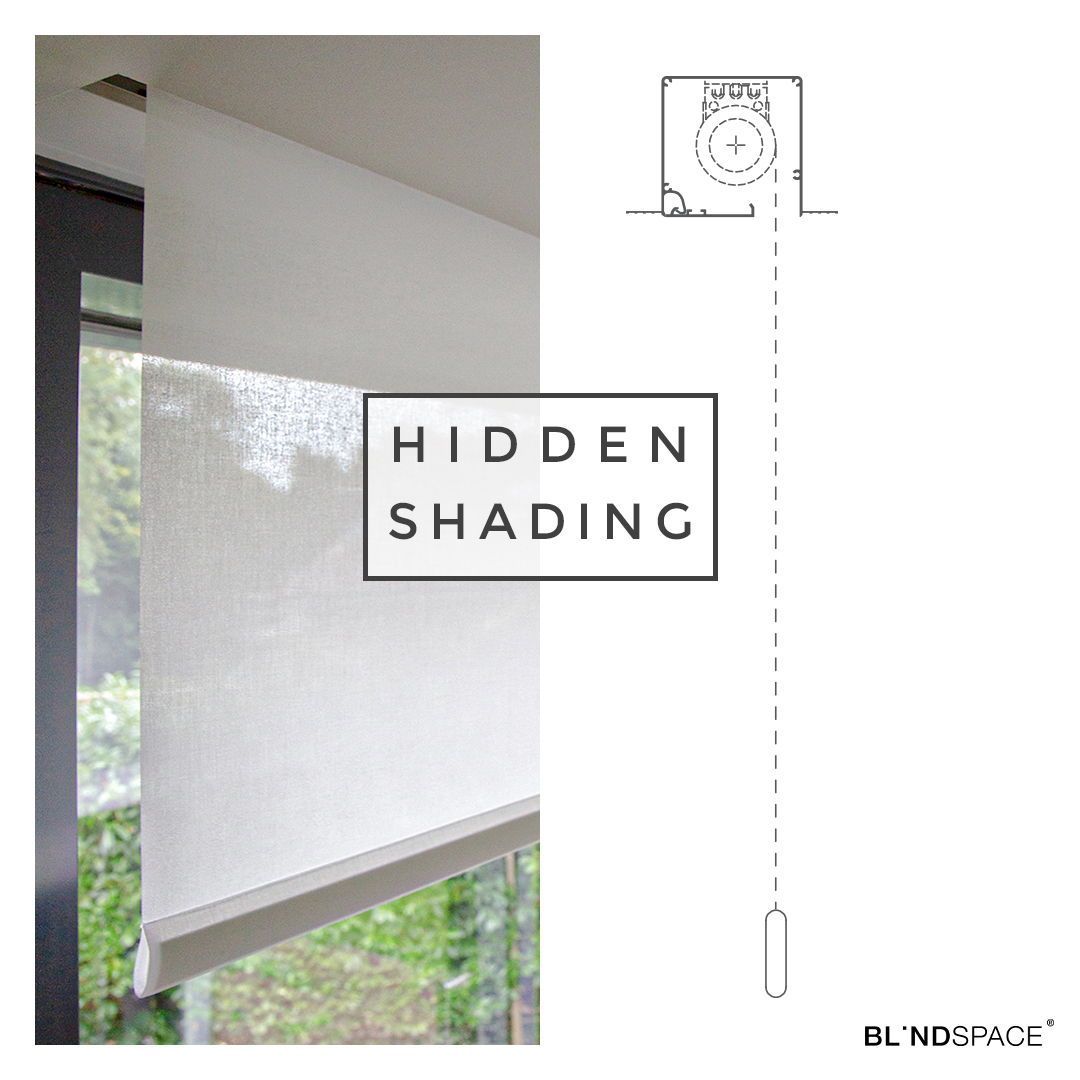
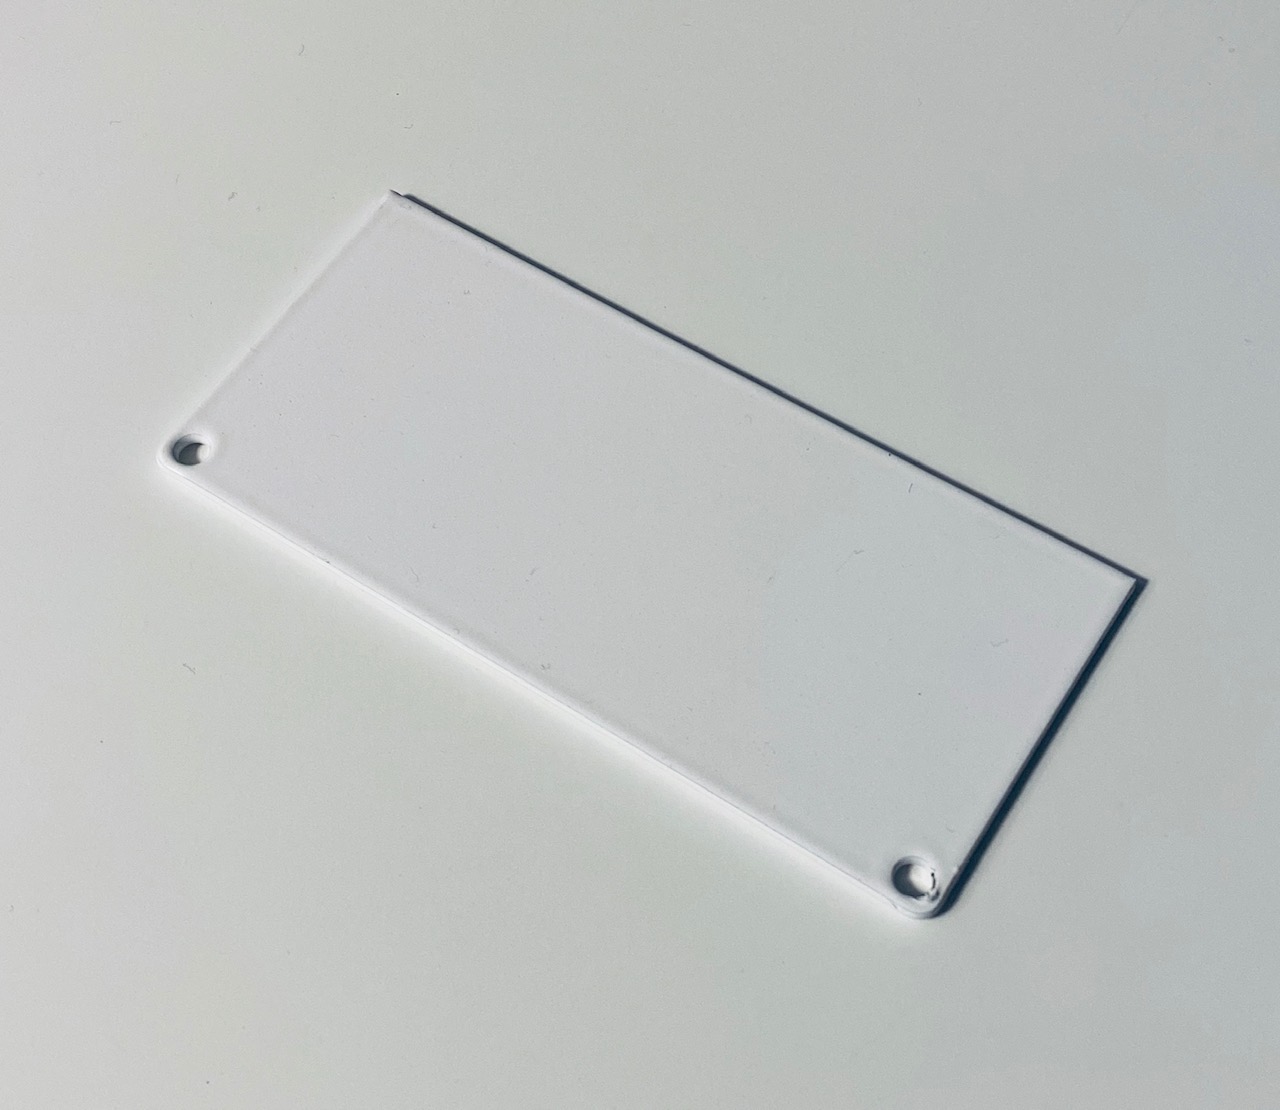
BlindspaceConcealment System is a unique solution to conceal any type of blind, in ceilings and skylights. Access is easy, with an integrated cover plate that clicks out and snaps shut leaving a discreet slot for blind movement.
The unique BlindspaceConcealment System design provides an elegant finished aesthetic and is easy to integrate, saving you time in both design and construction.
To place an order, click
EARLY. Blindspace Concealment System needs to be considered as early in your project as possible to ensure:
a) you have enough time to work through the detail with your architect or builder,
b) the necessary supporting structure can be incorporated into your design
c) sufficient lead-time is available for ordering. Allow 2 weeks minimum for standard sized boxes and
4 - 5 weeks for custom boxes.
The choice of Blindspace box comes down to two factors:
- Type and number of blinds used in each individual box e.g. single, double, tube size required for drop etc.
- Skim-coat flanges required.
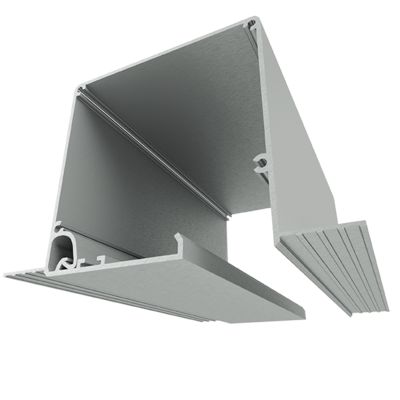
This will determine which type of head box you will need for your requirements. Read further below to find out about our standard range of Blindspace boxesSkim-Coat Flanges
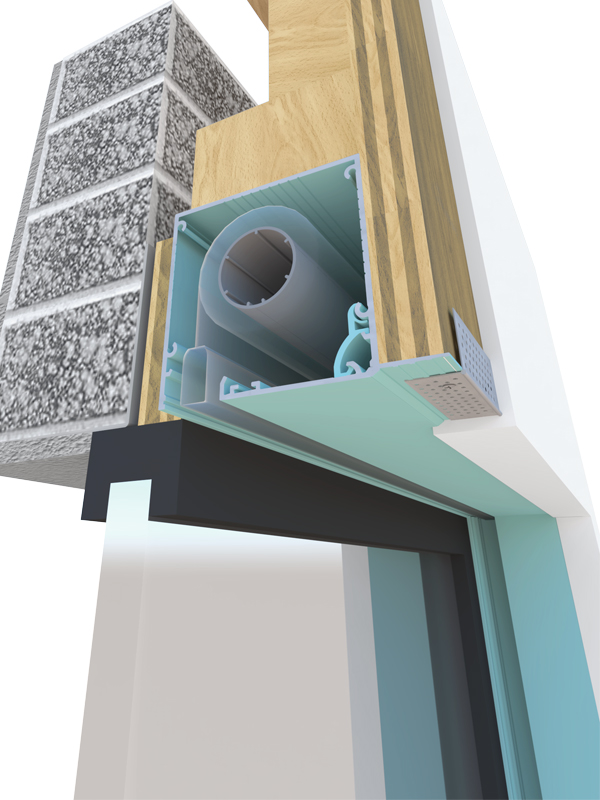
Blindspace Concealment System can come with a skim-coat flange on BOTH sides SS, one side only NS or no skim-coat flanges NN. In most cases people order with both skim-coat flanges SS, but there are numerous situations where only one side is desired e.g. When the Blindspace Concealment System needs to have one edge butt directly against a window frame on one side. Or in the case of timber ceilings when no skim coat flanges will be required.
Head Box Types
There are four standard sizes of head boxes for three different configurations of blinds and the option to order custom sizes. Each head type can come with one the three different skim-coat flange options.
|
Blindspace Box |
Drawing |
Opening/recess size for installation |
|
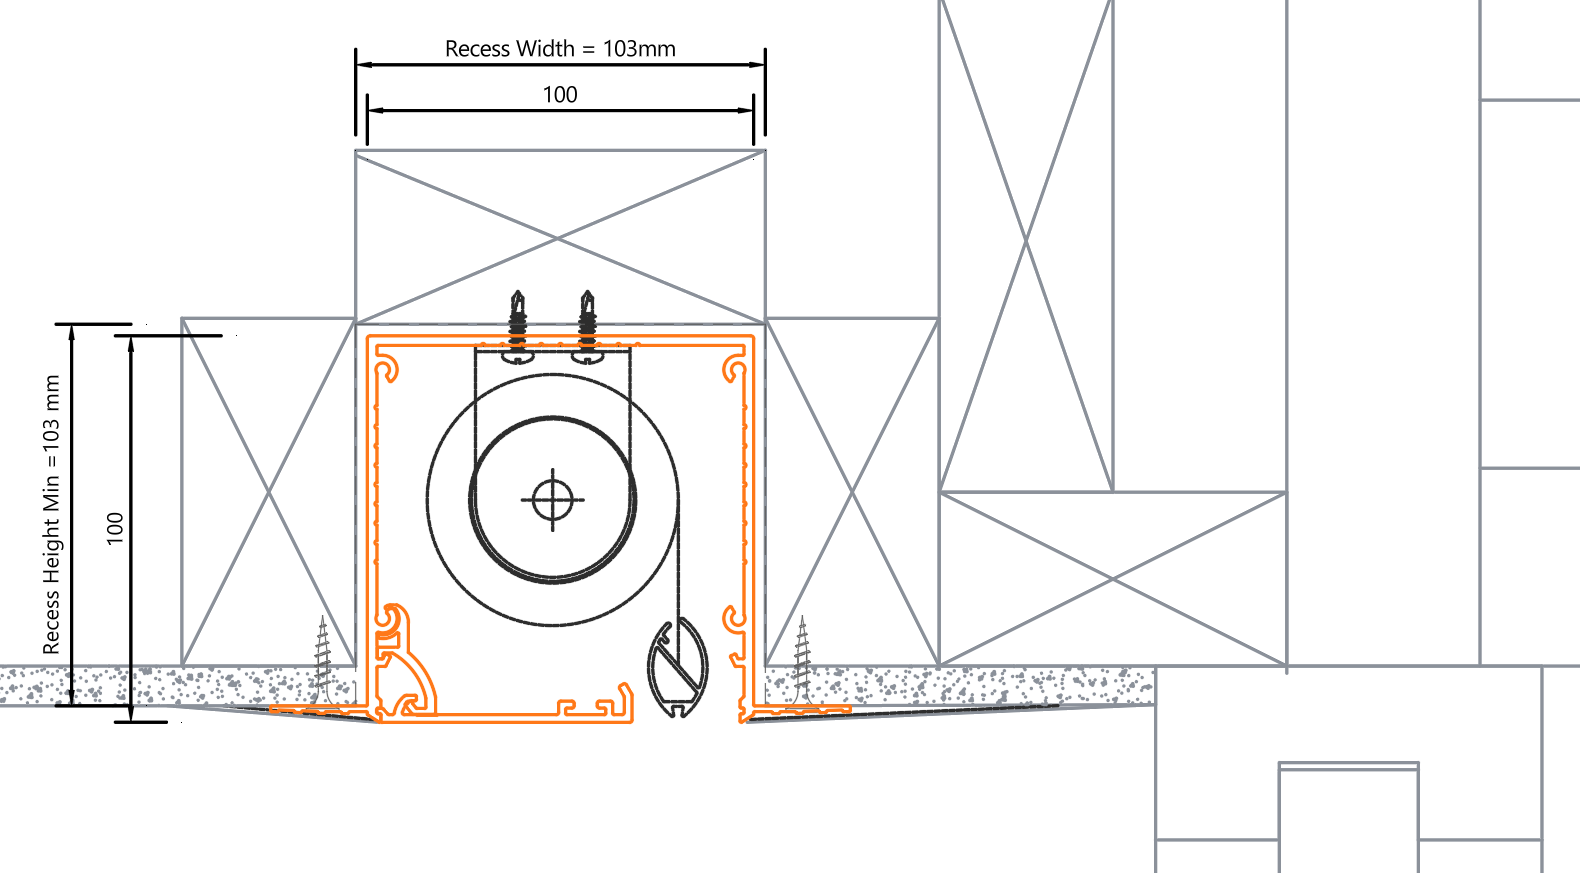
S100x100 (SS, NS, NN) (Standard 100mm by 100mm) for SINGLE standard medium sized roller blinds. Available as variant SS, NS, NN skim-coat flanges – see below Click |
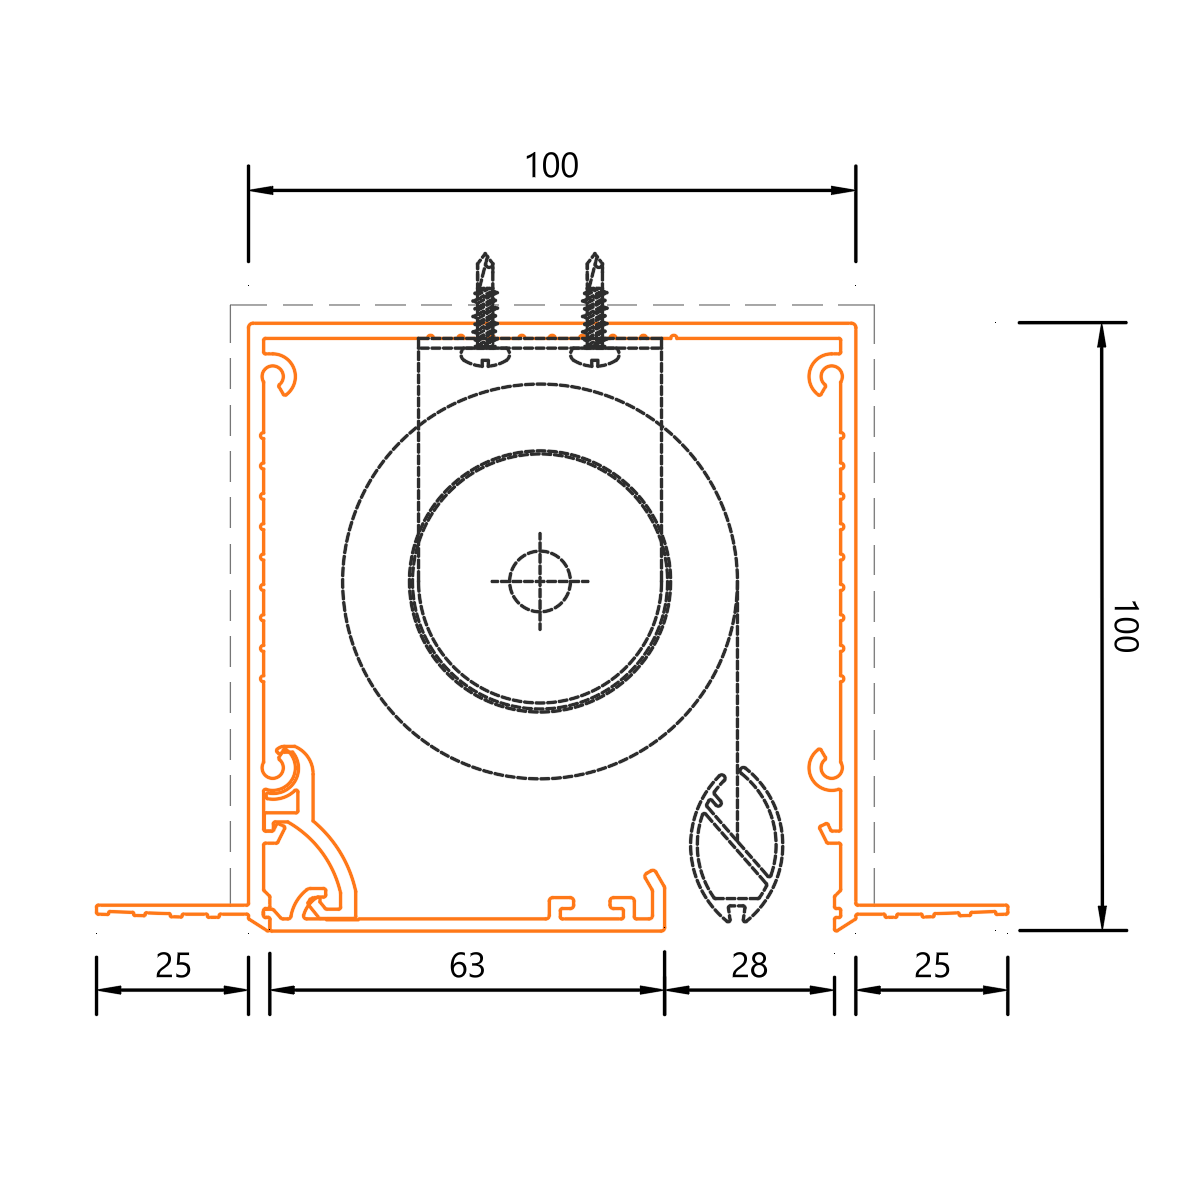 |
103mm x 103mm |
|
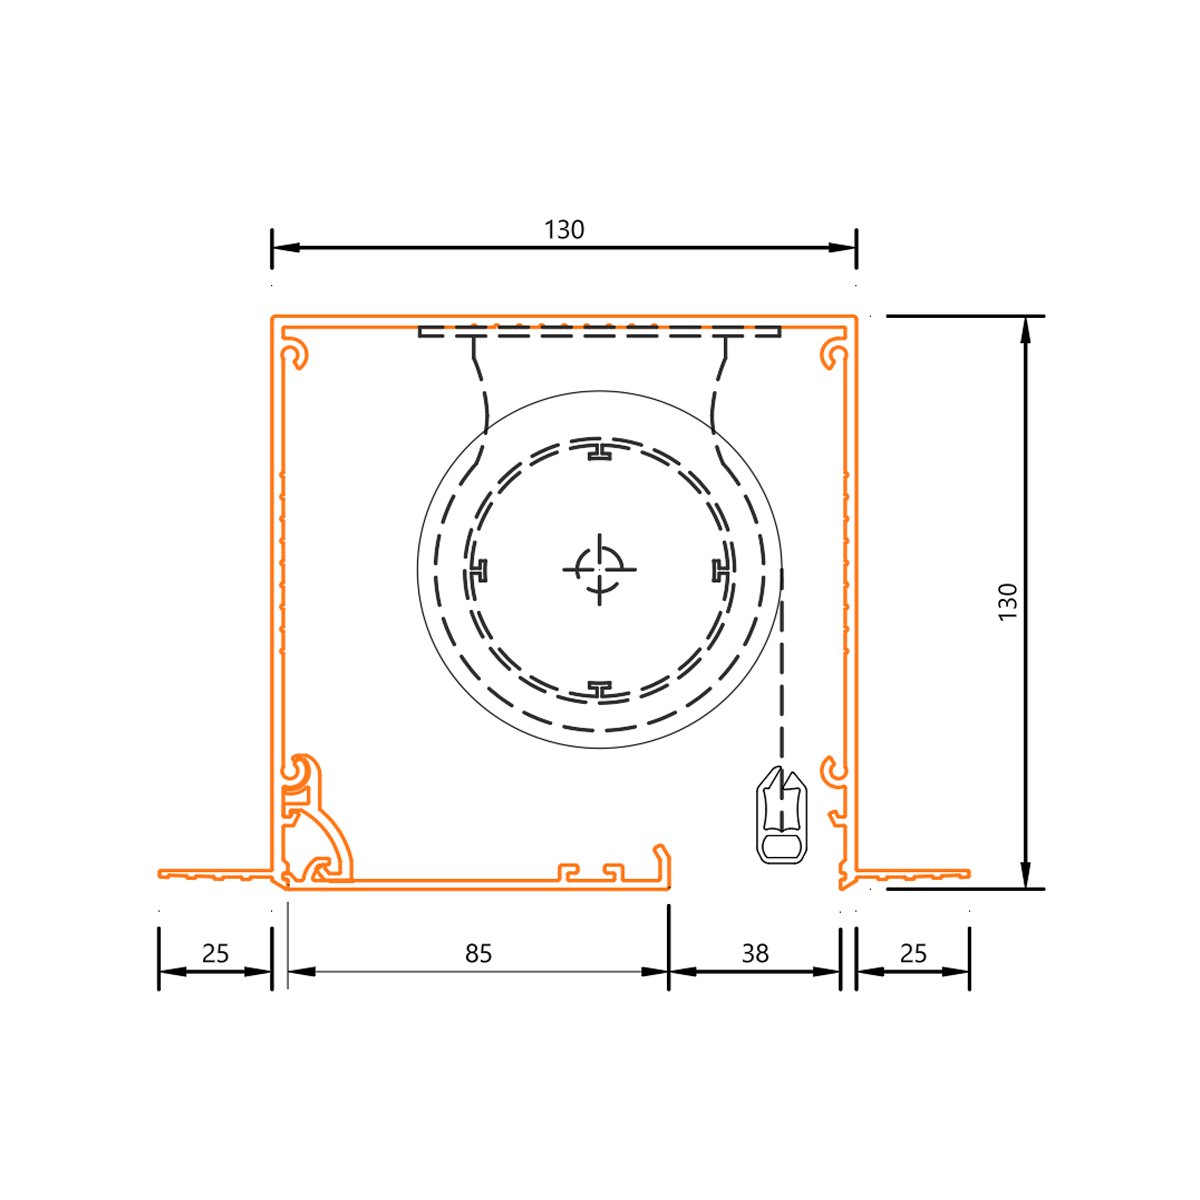
S130x130 (SS, NS, NN) (Standard 100mm by 100mm) for SINGLE standard medium sized roller blinds. Available as variant SS, NS, NN skim-coat flanges – see below Click |
 |
|
|
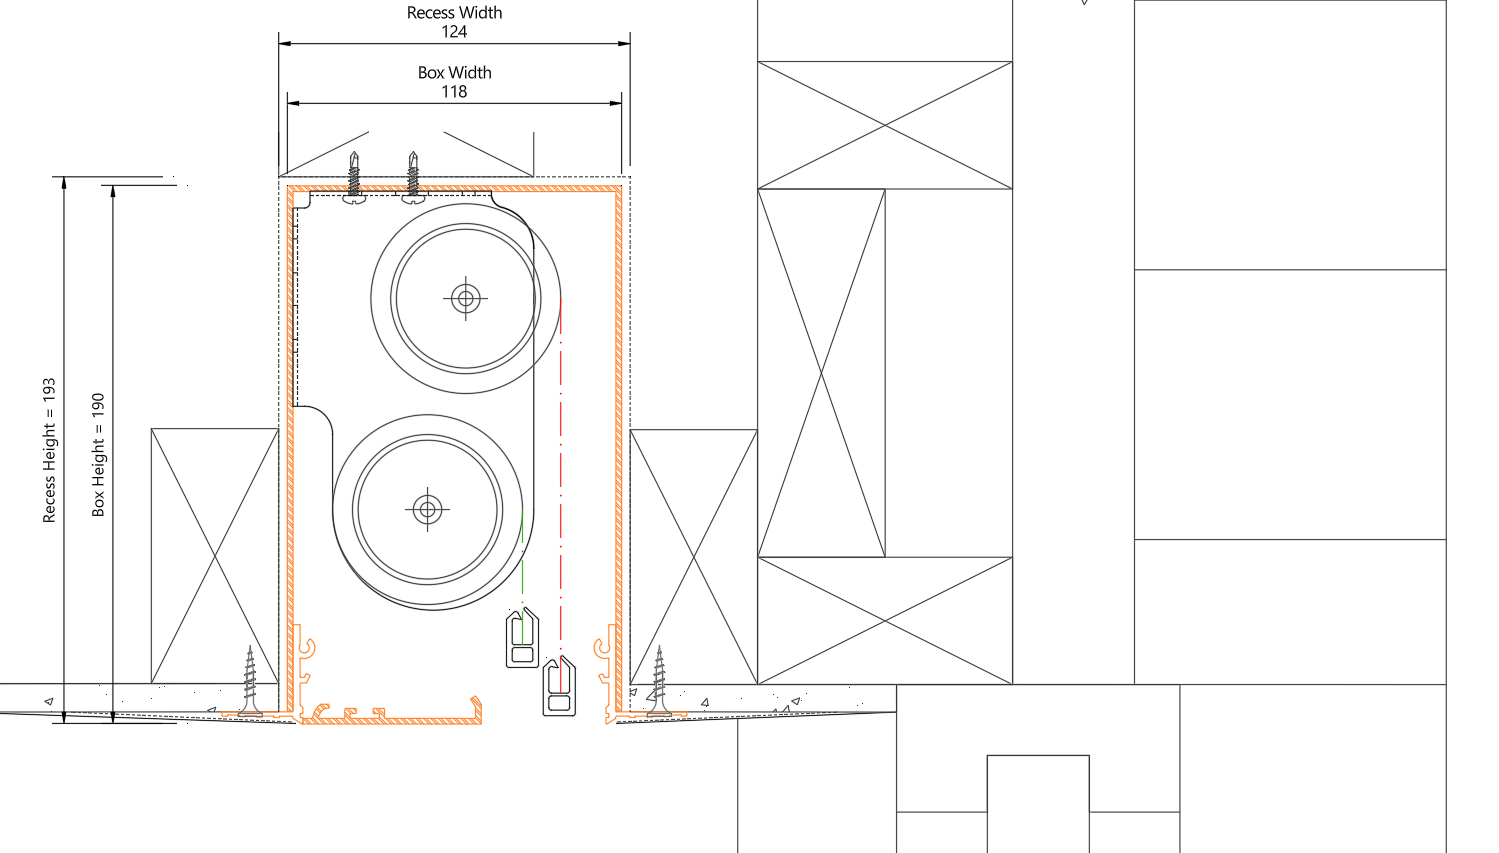
C118x190 (SS, NS, NN) For double blinds stacked vertically (Verosol Slimline Double Bracket shown) Available as variant SS, NS or NN skim-coat flanges – see below Click |
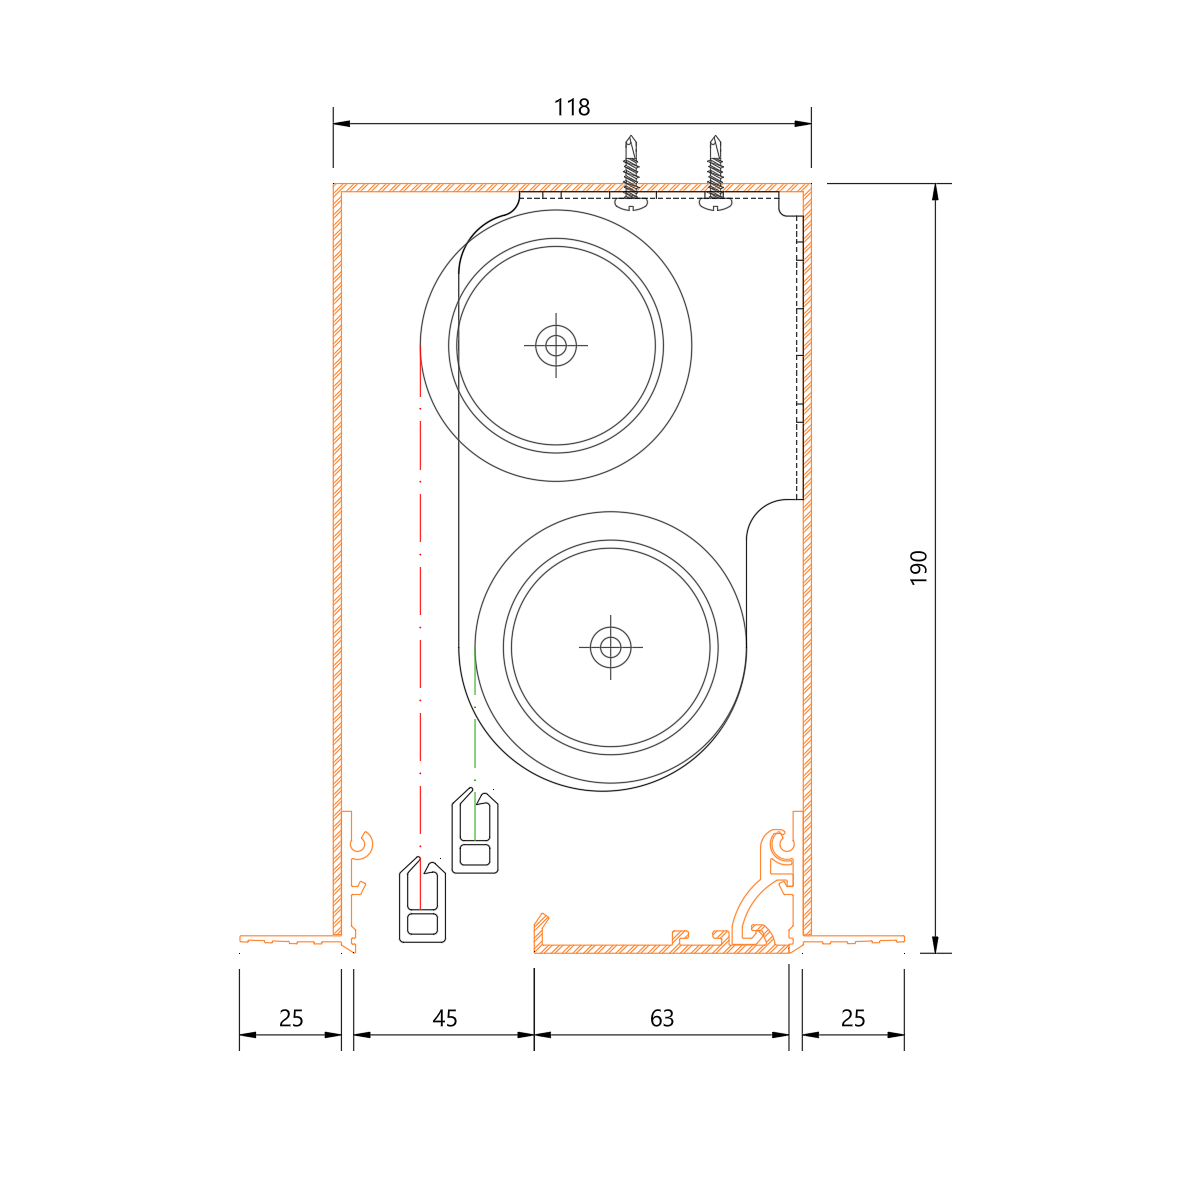 |
w121mm x h193mm |
|
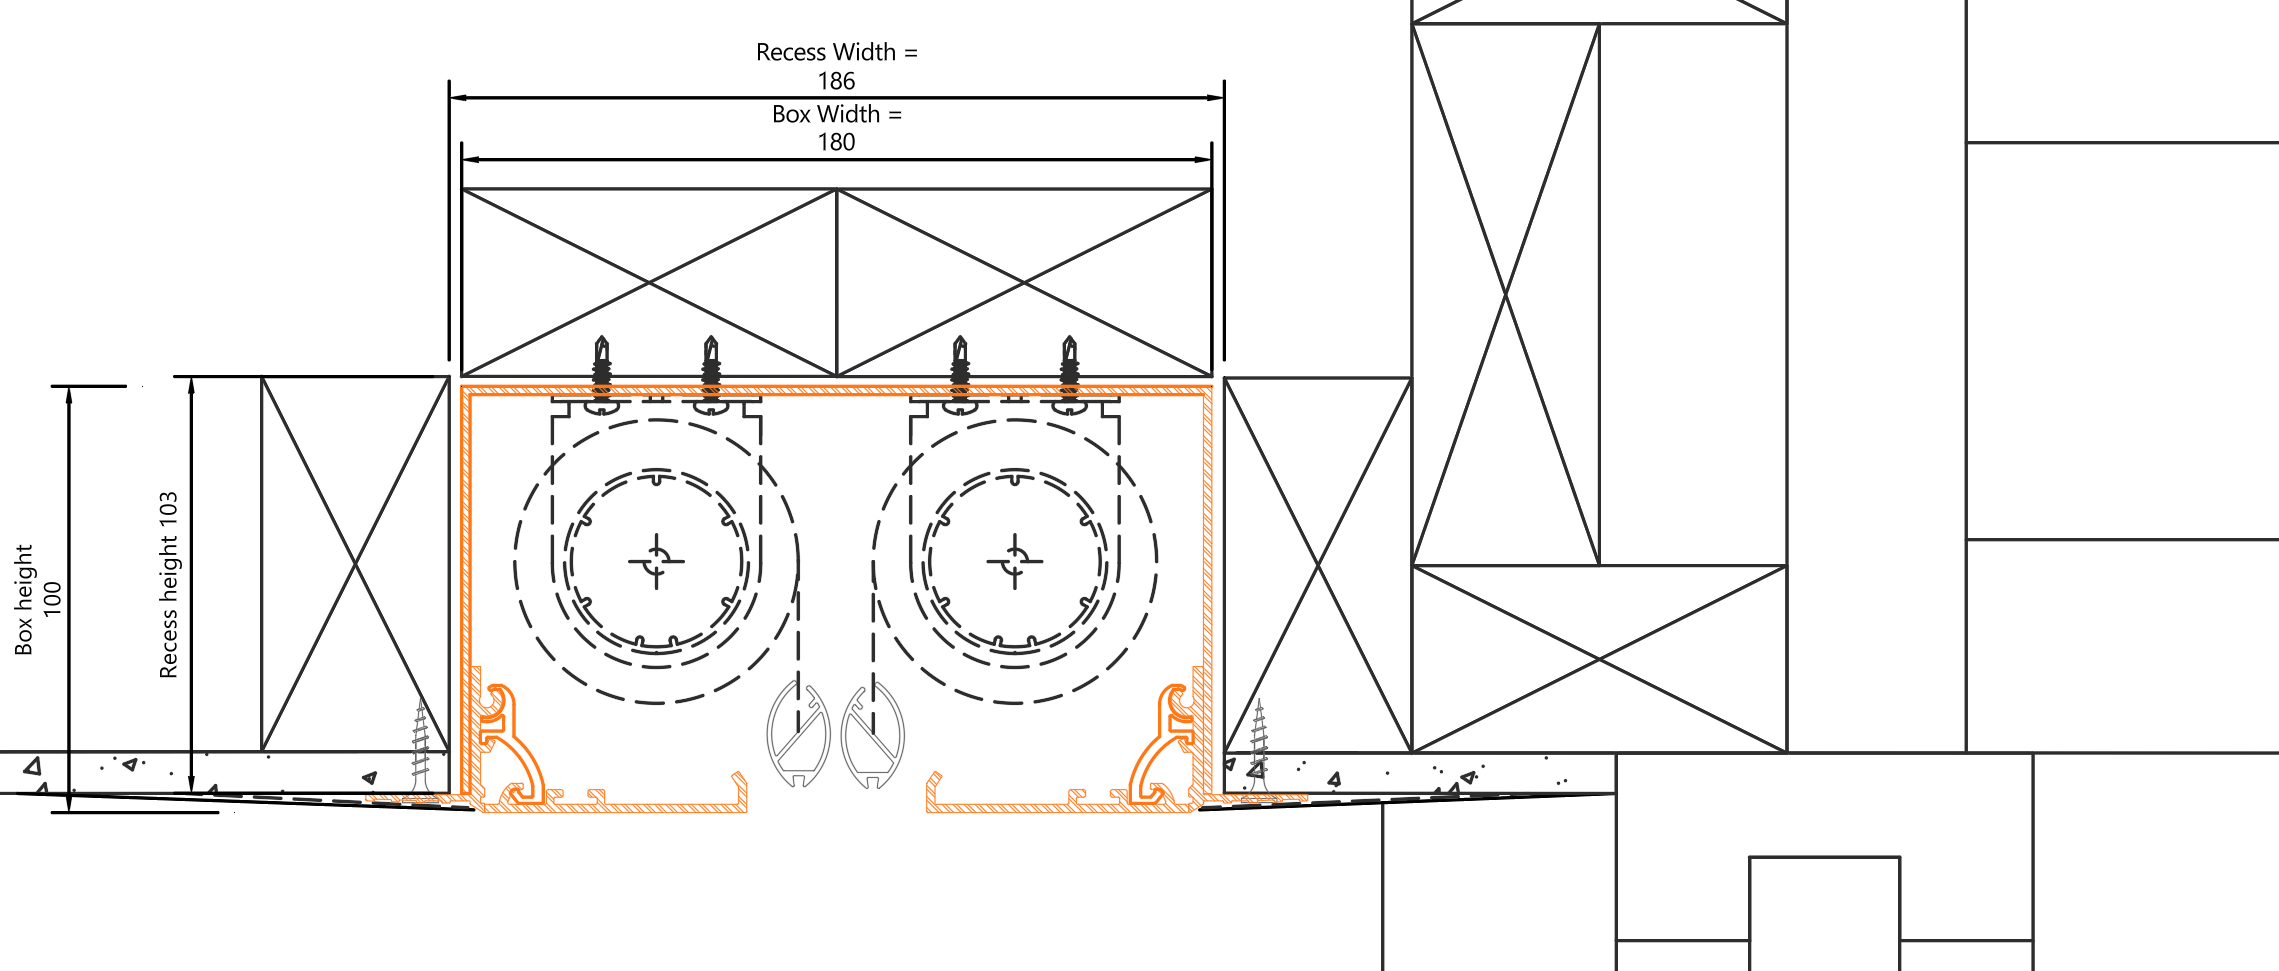
C180x100 (SS, NS, NN) For double blinds side-by-side Available as variant SS, NS or NN skim-coat flanges – see below Click |
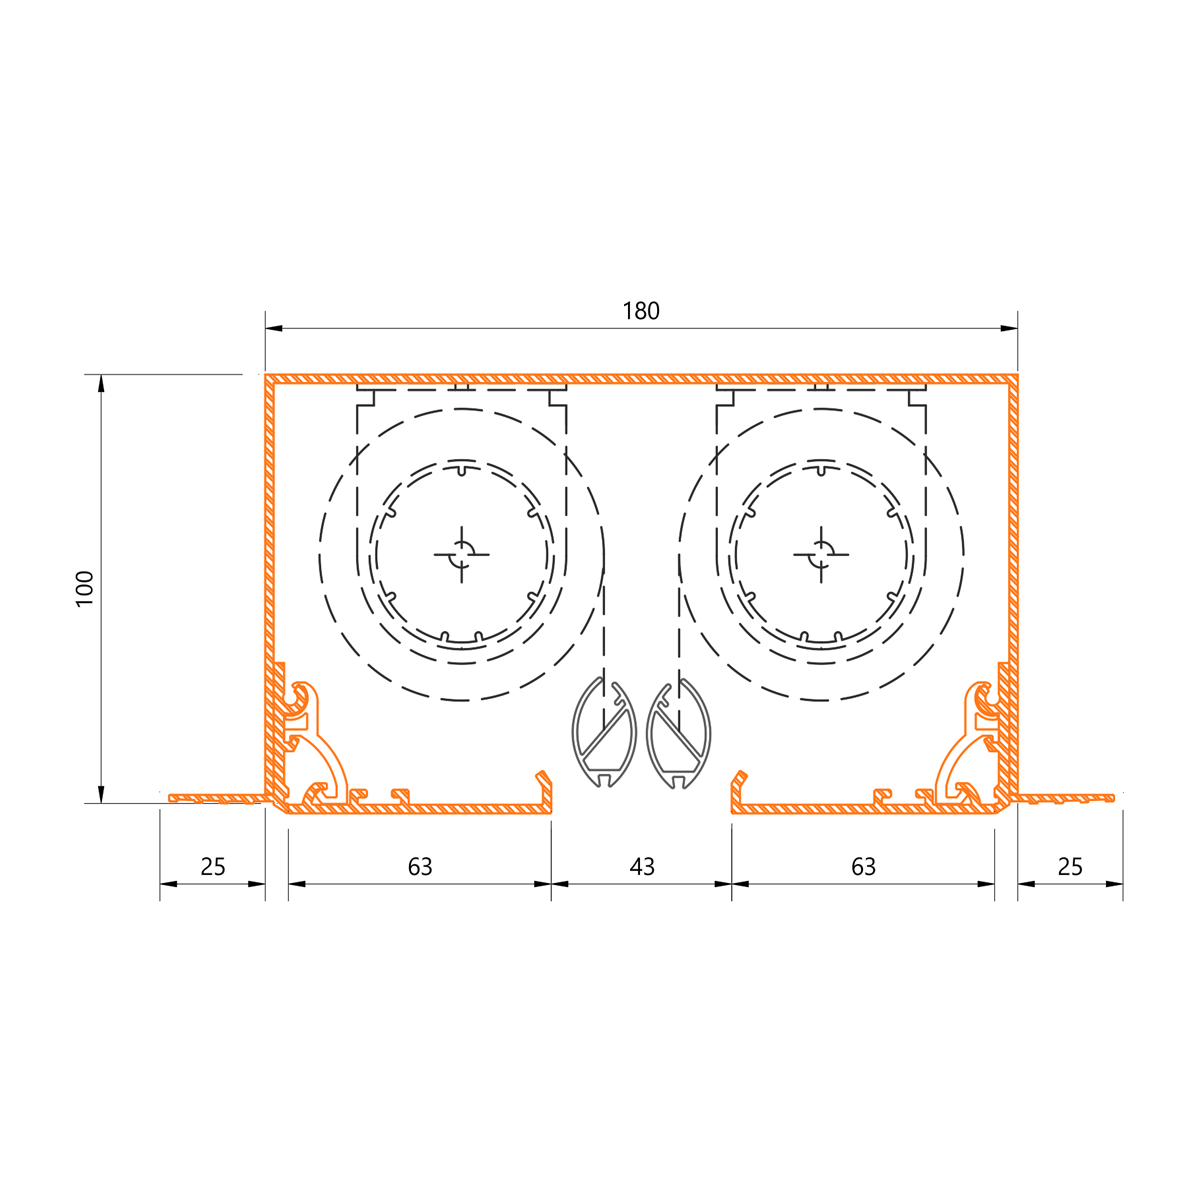 |
w183mm x h103mm |
|
Custom (SS, NS, NN) For large or special blinds custom manufactured options can be made to order. Available as variant SS, NS or NN skim-coat flanges – see below Contact us |
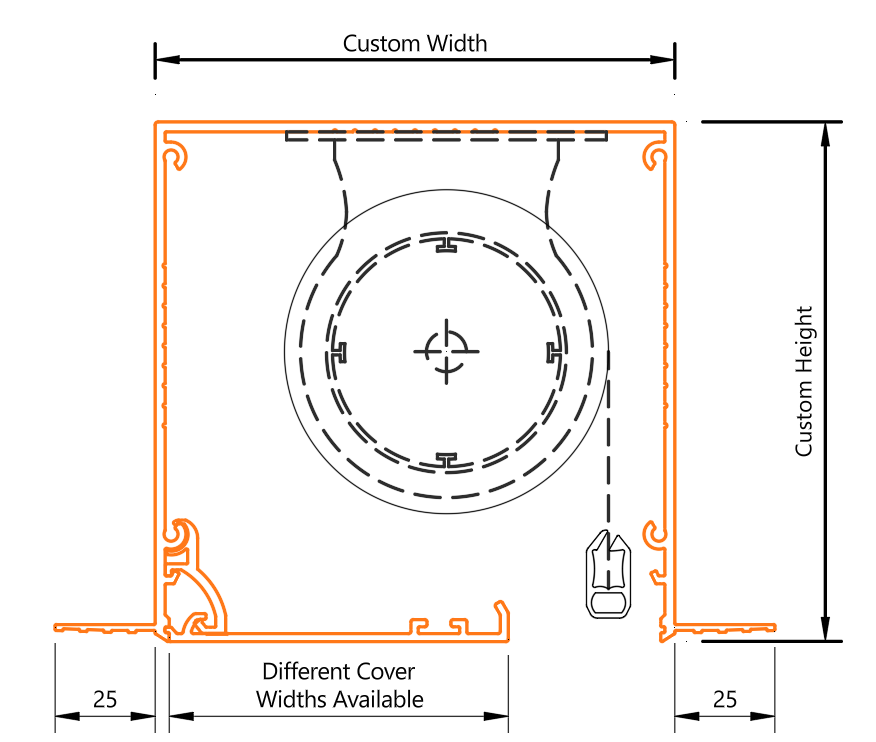 |
Contact us to discuss your requirements |
Blindspace boxes are supplied in an RAL 9016 Traffic White finish.
Custom colours are available to order. Allow a lead time of 5 weeks for custom colour orders.
Blindspace concealment boxes are available from Shade Factor and authorised dealers.
Shade Factor supplies the Blindspace Concealment System in full length, pre-cut lengths or custom sizes. The installation must be provided by your builder in accordance with our supplied general instructions.
We strongly recommend providing specification drawings and details (available above) to your architect so that they can incorporate Blindspace Concealment System in your project documentation. Some builders may be willing to work with you to detail where the system will go and how it is incorporated into the ceiling structure and installed ready for blinds. In general, each head box should be detailed so that the fit is accurate and sufficient supporting structure is allowed for.
If you intend to use motorised blinds, you will also need to detail this on the project electrical plan.
Blindspace concealment System should be installed by your project builder and then finished by your plasterer.
It is essential that installers strictly follow our installation guidelines, as correct installation is critical to the performance of the system. See installation guide and video demonstrations above.
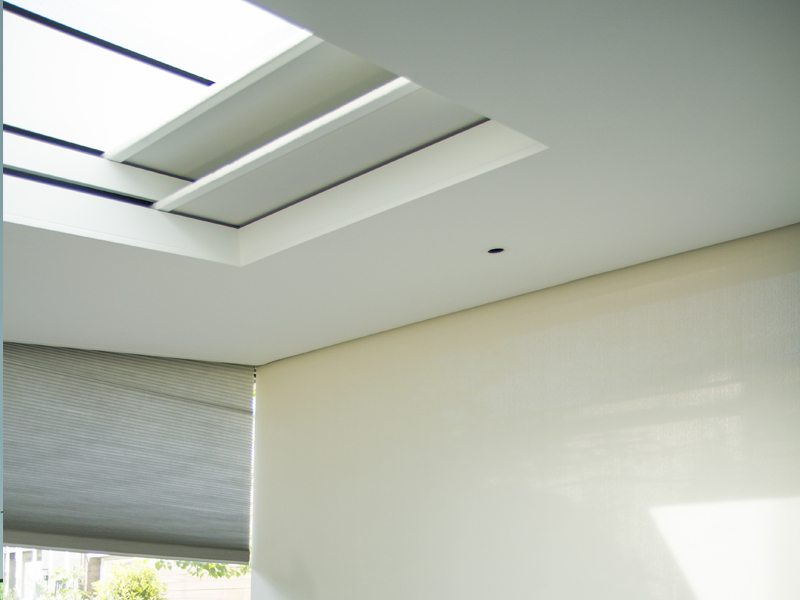
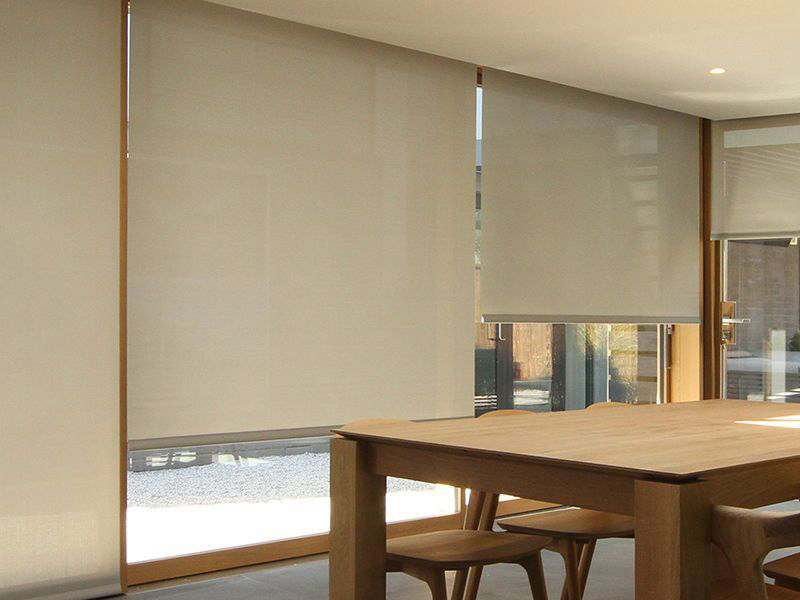
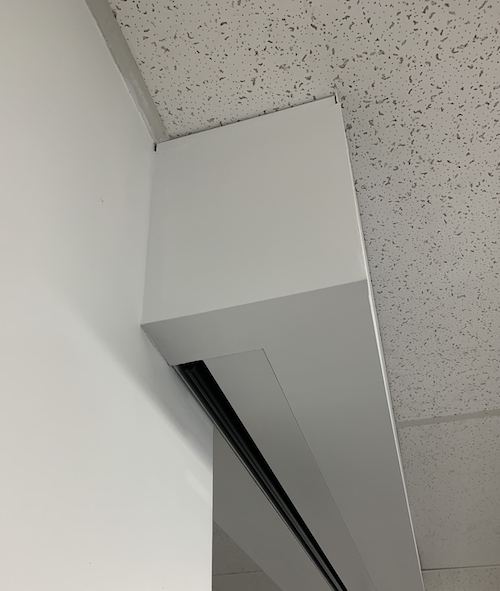
Blindspace Concealment System can be retro-fitted in many cases to existing buildings, but that will need to be discussed with your architect or builder. It can depend on how much space is available above the ceiling, whether the Blindspace boxes will interfere with rafters, and a number of other factors. One method of retro-fitting is to build a small bulkhead below the existing plane of the ceiling specifically to house Blindspace boxes (example photo below).
In general, 3mm needs to be added to the width and height of the Blindspace box to calculate the finished dimensions of the required recess. This allows sufficient room to easily insert the box but not enough to allow the box to move once installed (noting that boxes are glued and screwed according to instructions)
|
Blindspace Box |
Opening/recess size for installation |
|
S100x100 (Standard 100mm by 100mm) for SINGLE standard medium sized roller blinds |
 |
| S130x130 | 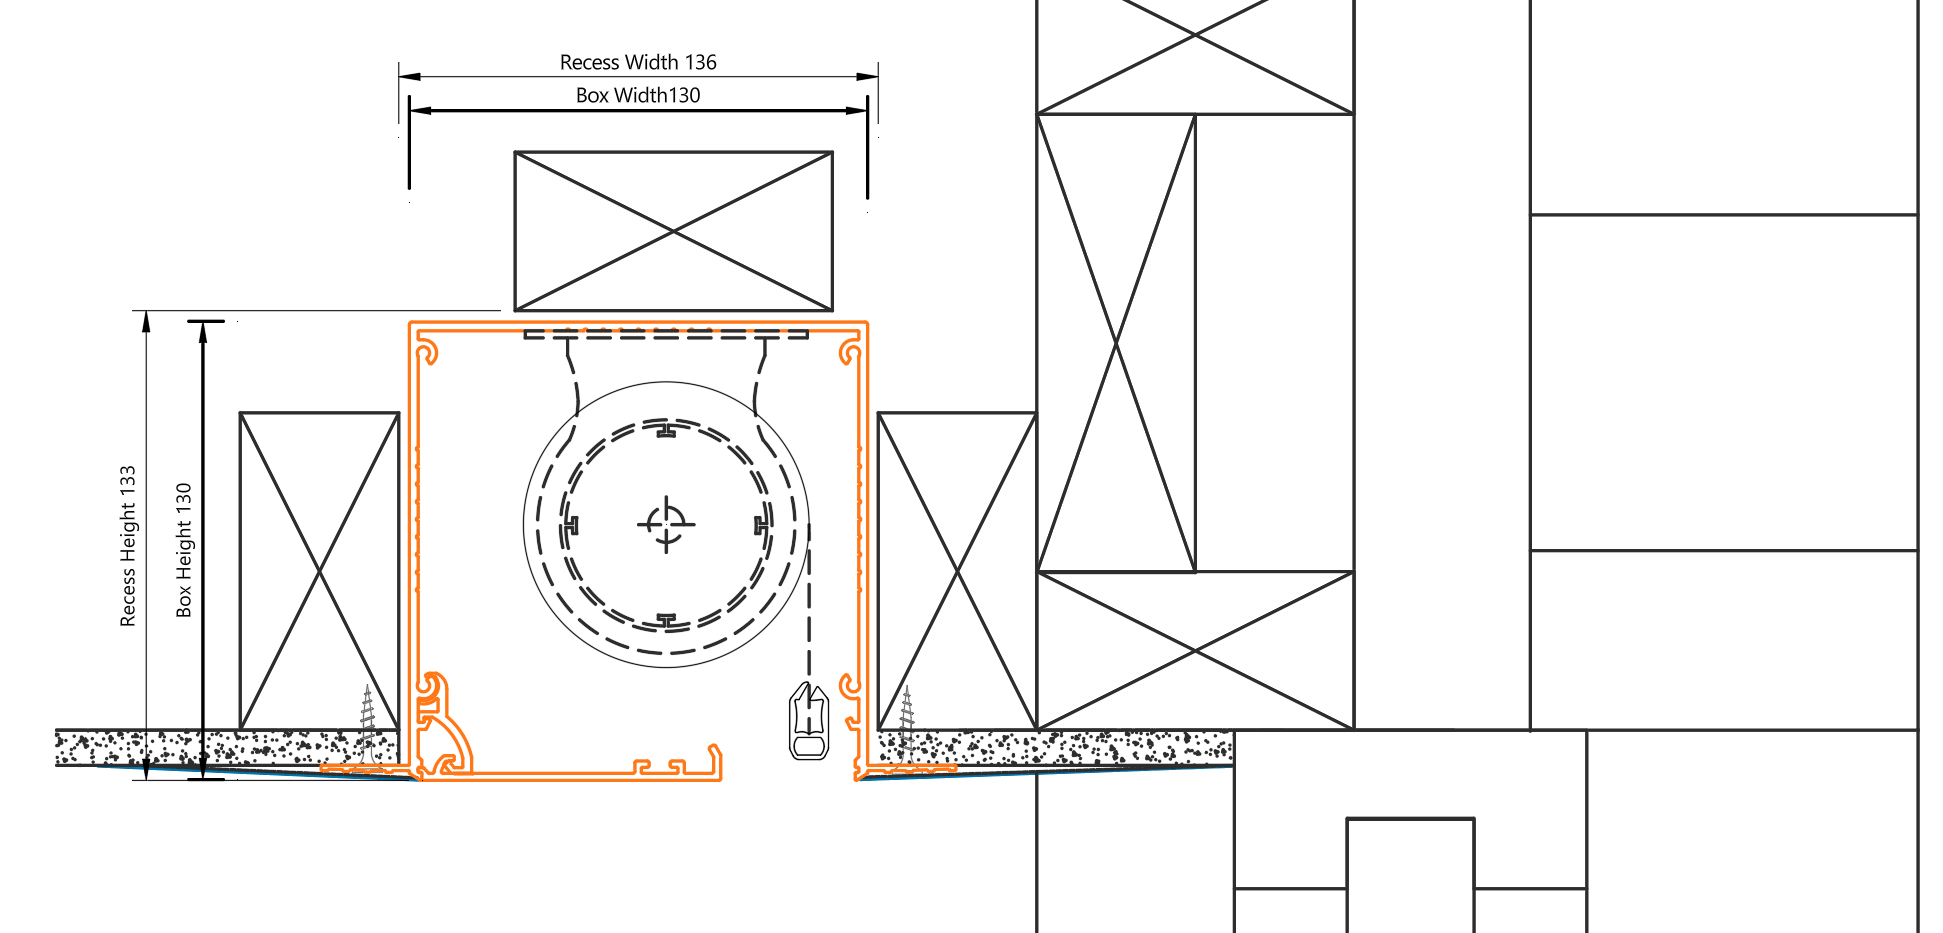 |
|
C118x190 For double blinds stacked vertically |
 |
|
C180x100 For double blinds side-by-side |
|
|
Custom For large or special blinds (made to order) |
In general, 3mm greater than the width and height of the specified outer dimensions of the Blindspace box |
For mitered corners, it is important to allow extra length for the two Blindspace boxes to be joined together.
The extra length required is equal to the width of the box. For example, an S100x100 box requires an extra 100mm allowance.
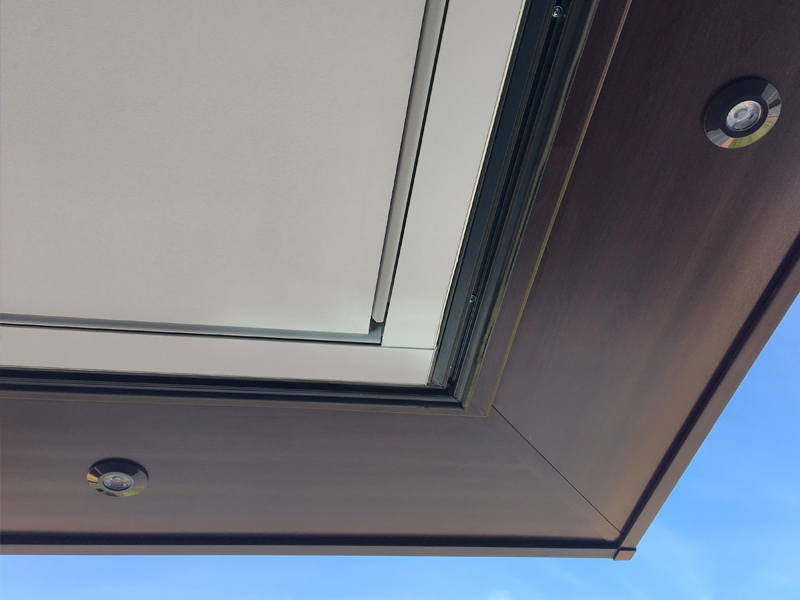
It is CRITICAL that the Blindspace cover plate is opened correctly to avoid the possibility of damaging the Blindspace head box, cover plate or cracking the ceiling plaster. Cover plates are NOT designed to be pulled down in one continuous length, from the centre OR in one movement. Instead, start at one end and work along the entire length of the cover plate, pulling down a bit at a time until the cover plate is open. Close using the same technique in reverse.
The head box once installed has been designed to be easily plastered in by and expereinced plasterer. Shade Factor offers detailed installation instructions which must be read in full and carefully followed.
Please refer to the installation guide above and if you have any further questions please contact Shade Factor.
Blindspace boxes must have enough height for the lowest point of the base-rail to retract inside the box when the blinds are raised. If Blindspace is to follow a sloped ceiling, there must be a) sufficient height above the ceiling to incorporate a tall enough Blindspace box, and b) the Blindspace box itself must be taller than the difference in ceiling height at either end of the blind. In general this means that Blindspace boxes are only suitable for ceilings with a small amount of rake. Gable ends are not possible based on the solutions currently available in Australia.
Victoria
+61 3 9558 3009
Boonwurrung Country
6 Plane Tree Avenue
Dingley Village VIC 3172
New South Wales
+61 2 9136 6090
Kuring-gai Country
7A Green Street
Brookvale NSW 2100
Shade Factor is proud to be the exclusive agents of Warema and Caravita in Australia and engages in projects all around the world.